 RoofingCalculator.io
Roof Inspection Checklist
By RoofingCalculator.io. Updated October 14, 2026. Prices, ratings and code references link to their sources.
Pricing your own roof? Get squares, materials and a 2026 cost range in about two minutes. Free, no sign-up.
A roof inspection checks six areas: the shingles or other covering, the flashing, the valleys, the gutters and downspouts, the deck and framing, and the attic. A professional finishes most houses in under two hours and charges about $150 to $400. You get a photo report that ranks repairs by urgency.
Use the checklist below to follow along with an inspector or to look over your own roof from the ground and the attic.
- Check the covering. Look for missing, curled, cracked or bald shingles and for granules collecting in the gutters.
- Sight down the ridge. A straight ridge and flat roof planes mean the structure is sound; sags and dips mean it needs a closer look.
- Inspect every piece of flashing. Chimneys, walls, valleys, vents and skylights cause most leaks.
- Test the gutters and downspouts. They should be tight to the fascia, slope toward the outlets and discharge at least 5 feet from the house.
- Go into the attic. Stains, frosted nails, poor ventilation and buried soffit vents show up there before they show up on a ceiling.
A full inspection covers structure, materials and moisture barriers
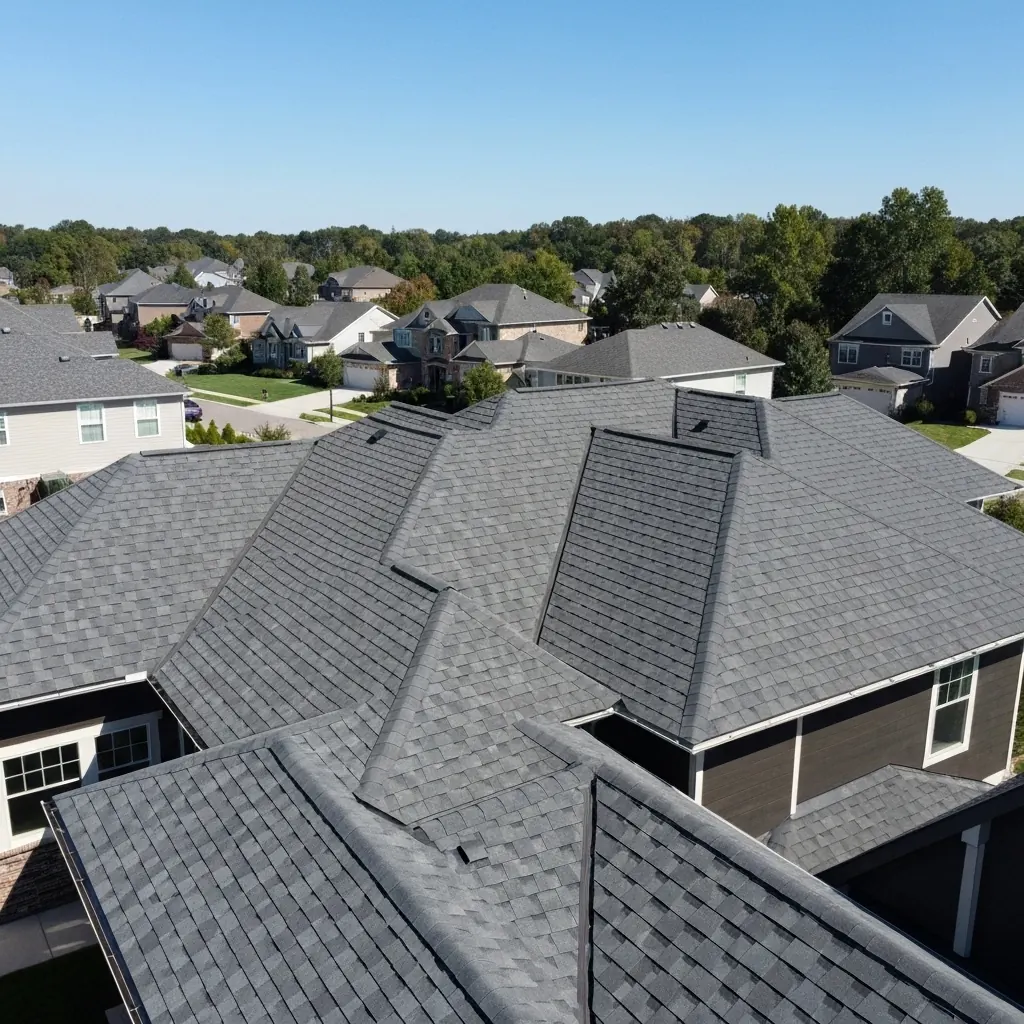
A full inspection examines the structure, the roofing materials and the moisture barriers, then estimates how many years the roof has left and what needs fixing now. Even a general home inspection has a minimum list. The InterNACHI Standards of Practice require checking the roof covering, gutters, downspouts, vents, flashing, skylights, chimney and other roof penetrations.
Budget 45 minutes to two hours, and more on a large or complicated roof. A good inspector catches early problems that are easy to miss, such as a hairline crack in one shingle, a ridge that has dropped half an inch, or flashing starting to lift at a corner. Fixed early, none of these becomes a ceiling stain or wet insulation. The report lists each problem with photos and a rough repair cost.
A roof inspection costs about $150 to $400
A standard inspection costs about $150 to $400 on a typical house. That covers someone climbing the roof, checking the attic and writing the report. A very large house, or a pitch steep enough to require special safety gear, can push the price close to $600.
| Inspection type | Typical cost | Best for |
|---|---|---|
| Walk-on inspection with attic check | $150 to $400 | Most houses |
| Drone inspection | $200 to $500 | Roofs steeper than 8:12, clay tile |
| Infrared moisture scan | $400 to $800 | Finding trapped water, especially under membranes |
Drones capture sharp 4K images of the whole roof without anyone stepping on fragile tile, but a drone cannot feel for soft spots in the deck. Infrared cameras read temperature differences across the roof. Wet insulation holds heat longer than dry insulation, so water trapped under a membrane shows up on the screen before anything drips inside.
Shingle and covering checklist
On asphalt, the granules come first. These ceramic-coated stones shade the asphalt (bitumen) from UV, and once they wash away the asphalt dries out and cracks. Bald black patches on the roof or gutters full of coarse, sand-like grit mean the roof is near the end of its life.
- Granule loss. Look for bare patches on the roof and granules piled in the gutters and at downspout outlets.
- Cupping and clawing. Edges turned up (cupping) or curled under (clawing) mean the shingles are drying out and losing their grip.
- Cracked, missing or lifted shingles. Note each one and its location, especially near vents and edges.
- Wood shakes. Check for rot, moss and splits.
- Metal roofing. Check for rusty fasteners, rusty panels and sealant pulling away at the seams.
- Tile and slate. The pieces can last 50 to 100 years, so focus on the fasteners and underlayment. Perfect tiles over rusted nails or crumbling felt paper still make a problem roof.
Roof structure checklist
Start from the street by sighting down the ridge. A straight ridge is a good sign, while a sag or dips across the roof plane point to trouble in the framing.
- Sagging ridge. This can come from rafters too small for the load, a failed ridge board, or rafter spread, where the walls push outward because the ceiling joists are not tied in properly.
- Dips between rafters. These usually point to the deck, the 7/16-inch or 5/8-inch plywood or OSB under the shingles. Leaks or a humid attic make it delaminate or rot.
- Soft spots underfoot. Any section of deck that feels spongy should be replaced at the next reroof.
- Fascia and soffit. Check the trim boards along the roof edge for rot. Rotten fascia often traces back to gutters that back up or hang wrong, so water wicks under the shingles.
Flashing checklist
Flashing is the most likely cause of any roof leak. It is the metal (galvanized steel, aluminum or copper) that seals every spot where the roof meets something else.
- Chimney flashing. It has three parts: apron, step and counter-flashing. The counter-flashing must be set into the chimney's mortar joints, or water runs down behind it.
- Step flashing at walls. Each piece should lap the one below by at least 2 inches so water keeps moving downhill.
- Kick-out flashing. A kick-out at the bottom of each roof-to-wall run steers water away from the siding and into the gutter. Many older houses lack one, and a missing kick-out is behind a lot of rotted wall framing.
- Valleys. Open valleys show a metal W-channel down the middle; closed valleys have shingles lapped across. In either type, check for packed leaves and pine needles, which hold water and rot the shingles from the top down.
- Vents, pipe boots and skylights. Look for cracked rubber boots, lifted edges and dried-out sealant.
Gutter and drainage checklist
Gutters should drop about 1/4 inch for every 10 feet toward the downspout. Too flat and water sits in them, breeding mosquitoes in summer and forming ice in winter. Too steep and water overshoots the downspout, and the gutter looks crooked from the street.
- Fasteners. There should be a hidden hanger or spike and ferrule into the fascia every 24 inches, or every 18 inches in snow country.
- Secure attachment. A loose gutter full of rain or snow can tear off, pull the fascia with it and dump water at the foundation.
- Downspout discharge. Downspouts should release water at least 5 feet from the house.
Attic checklist
No inspection is complete without the attic, because the underside of the deck shows what the shingles hide.
- Stains on the deck. Dark stains mean a current or past leak.
- Shiners. These are nails that missed the rafter and poke through. In a poorly vented attic they frost over all winter, then melt in spring and drip onto the insulation, and the roof often gets the blame.
- Ventilation. The International Residential Code requires net free vent area of at least 1/150 of the vented attic space, or 1/300 when rules on upper vent placement (and a vapor retarder in the coldest climate zones) are met. Ideally the area is split evenly between soffit intake and exhaust near the ridge. A hot attic bakes the shingles from below and ages them faster.
- Insulation depth. Cold climates commonly call for about R-49 to R-60, roughly 16 to 20 inches of blown-in fiberglass or cellulose.
- Blocked soffit vents. If insulation covers them, expect a recommendation for baffles to restore airflow.
Each roofing material has its own weak spot
Each material has its own common failure point, and a good inspector checks for it specifically.
- Asphalt shingles: the sealant strip. The strip needs heat to bond. Shingles installed late in a cold fall may not seal until spring, which leaves them exposed to winter wind. A good inspector lifts a few in different spots and checks the bond by hand.
- Clay and concrete tile: cracks and battens. Tile weighs up to 1,000 pounds per square (a 10-by-10-foot area). Inspectors look for chattered or cracked tiles, often caused by people walking on them incorrectly. Wood battens under the tile rot if water gets beneath, and the tiles then slide out of line.
- Standing seam metal: oil canning and fasteners. Oil canning is a wavy look in the flat part of the panels and is usually cosmetic. Severe oil canning can mean the fasteners are too tight for the metal to move with temperature, and that strain eventually wears the fasteners and lets water in.
Weather and bad installation shorten roof life most
Weather and poor installation shorten roof life far more than age alone. On a July afternoon a roof surface can reach 150 degrees Fahrenheit. If a thunderstorm then dumps cold rain on it, the asphalt contracts suddenly (thermal shock) and can crack.
Daily sun also breaks down the asphalt until it turns brittle, which is why north slopes often outlast south slopes. North slopes have a different problem: less sun means more algae and moss.
The most common installation error is high-nailing. The nail goes in above the marked line, misses the double-thick part of the shingle and fails to pin the shingle underneath, so the first strong wind lifts it. Over-driven nails are the other frequent mistake, because the head punches through the shingle and creates a leak from day one.
What should a roof inspection report include?
A good report sorts every finding by urgency. Many use a traffic-light system: red for immediate repairs, yellow for maintenance that can wait six to twelve months, and green for parts in good condition.
- Photos of every defect. Chimney flashing, pipe boots and individual cracked shingles should each have a clear photo, which you will need for an insurance claim or a sale negotiation.
- Date of loss or material age. For an insurance inspection, the report must state the date of loss or the age of the materials, because that decides whether the roof qualifies for a replacement claim.
- Labor and materials listed separately. Repair estimates should split the two.
- A patch-or-redo call. If around 10 percent of the shingles are damaged, the report should say whether they can be patched or whether the whole slope should be redone so the color matches.
Questions to ask the roof inspector
Check who you are hiring before the inspection. General home inspectors and roofing contractors who specialize in inspections do different jobs.
- Where is your permanent place of business?
- Can your insurance agent send a certificate of general liability and workers' comp coverage?
- Will you use a moisture probe or thermal camera in the attic?
- Will you walk the roof or fly a drone?
- Are you certified by a major manufacturer such as GAF, Owens Corning or CertainTeed? Certification means training on that brand's installation rules, and an inspector who knows a Golden Pledge or Platinum warranty well knows which mistakes would void it.
Inspect every two to three years and after big storms
Schedule an inspection every two to three years. Some events call for one right away: a storm with gusts over 50 miles per hour, or hail larger than 1 inch across. Hail damage is usually invisible from the ground. The impact bruises the shingle and cracks the mat inside, and the leak appears a few years later.
If you are selling, get a pre-listing inspection. Knowing the roof's condition in advance lets you fix problems or price the house accordingly, so a buyer cannot demand a large price cut at closing.
Spring is the best time for the routine inspection. Winter ice dams and freeze-thaw cycles pry open weak spots that were hidden in the fall, and a cracked pipe boot found in April costs far less than a ceiling leak in a July storm.
Should you repair or replace after a roof inspection?
Replacement usually makes more sense if repairs add up to more than 25 to 30 percent of the cost of a new roof, or if the roof is within five years of its expected life. The roofing calculator gives a rough new-roof figure to compare against the repair list, and the full decision is covered in roof repair and replacement.
If the shingles are still flexible, most granules remain and the only problems are a few leaks at the chimney or vents, repair those spots. A targeted repair like that usually costs $500 to $1,500.
The report's real value is information. Once you know the actual condition of the flashing, the insulation depth and the deck, a high-pressure salesperson has much less to work with.
Roof inspection checklist questions
What do roof inspectors look for?
Inspectors look for damage to the covering first: missing, curled, cracked or bald shingles. They then check the flashing, valleys, vents, chimney and skylights, along with the gutters, fascia and soffits. In the attic they look for stains, rot and poor ventilation, and they flag structural problems such as a sagging ridge or a soft deck.
How much does a roof inspection cost?
A standard inspection usually costs $150 to $400, covering a walk of the roof and a written report. A drone inspection runs about $200 to $500, and an infrared moisture scan about $400 to $800. Steep or very large roofs cost more.
How long does a roof inspection take?
Most houses take 45 minutes to two hours, including the attic. Large, steep or cut-up roofs take longer. The written report with photos usually arrives a day or two later.
How often should you get a roof inspection?
Every two to three years, and every year once a shingle roof is about 15 years old. Book one right away after hail or a severe windstorm. If you plan to sell soon, a pre-listing inspection usually pays for itself.
Is a roof inspection part of a home inspection?
Partly. A home inspector takes a basic look at the covering, gutters, flashing and penetrations, sometimes only from the ground or a ladder. A roofer doing a dedicated inspection usually walks the whole roof and estimates how many years it has left.
Prices are 2026 US national averages and building codes vary by town. Materials, warranties and code adoptions change, so confirm prices with local contractors and code rules with your building department before you sign anything.
Estimate Your Roof Cost
Use our free roofing calculator. No sign-up required.